


I love to play with paper, and I love to create tailored frames around the central panels on a card. I’m often asked, “what are the dimensions on your card?” and I can’t give a good answer without pulling out a ruler – because I don’t start with measurements in mind.
Today, I want to share the steps I take to create perfect borders on my cards while keeping everything tailored and balanced. Every time I make a card, I think, “How can I explain this to people?” I gave up on trying to explain it and thought it’d be easiest to just show you.
I hope you enjoy this video that walks you through my process for finding the right balance of borders:
This is the second video I’ve posted about this project – the first video showed how I combined sentiments from different sets to make this “you’re invited” and how I chose the colors for this fun card. You can see that video and write-up here.
My original card was posted for this week’s Global Design Project theme challenge (see it here). While I love the card, it’s not particularly amazing. I think that’s why I have continued to delve into the elements of the card – I’m pointing out the fun and exciting elements of a less-than-amazing card.

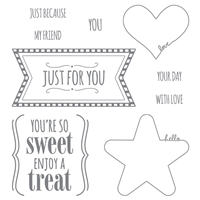
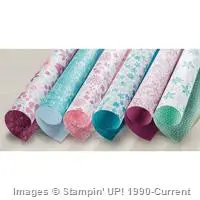
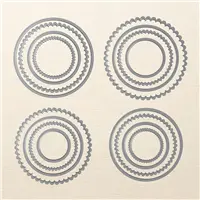
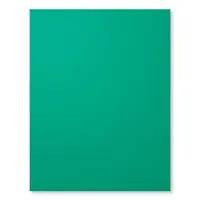
Stamp Sets: You’re So Sweet, Marquee Messages Papers: Blooms & Bliss Designer Series Paper, Emerald Envy, Island Indigo, Whisper White Inks: Emerald Envy Accessories: Layering Circle Framelits Dies, Stampin’ Dimensionals


What do you think? Did you find these tips helpful?
Thanks for stopping by today!
Brian

 BONUS DAYS in July. Stampin’ Up! is introducing a Bonus Days promotion in July – for every $50 you spend between July 7 and July 31, you’ll receive a $5 coupon to redeem in August. To read more about how you can earn these coupons, CLICK HERE.


Such fun to see your “process.” The BK brain never ceases to amaze. I agree that the pop of white border brought it all together (balance of light and dark). Love the tip to use the base of the trimmer to line up and adhere!
Great video Brian! Thanks so much for showing us the process! And I love the way you use the trimmer to line up the edges before you adhere! Two thumbs up!!
Brian, thank you for the video … I “kinda-sorta” do the same thing EXCEPT I hadn’t thought of trimming it so methodically as you shared! I guess you’d call mine “hit or miss” … thank you for making it faster, simpler, and less paper-wasting to get the mats just right! ?
Excellent video!! Thank your BRian.
Thanks for all the tips….but my favorite was turning the trimmer upside down. I always work from the top but never from the bottom….of course you can do that without turning upside down but just never though of this. Will try the next time I sit down and trim away.
HI Brian:
Thank you for the great video. I made myself a measurement list which I keep next to me when I’m putting a card together. Since I don’t have the artistic eye you have I need to rely on math. Wish I had your ability to “see” just the perfect size. I hope you have a Special Saturday.
If I were to guess your “sawing” away the edges till you like it, I wouldn’t have thought it would be that way at all. I love the “seat of your pants” kind of designing on this card. In regard to your little bit of “waste”, I would/have used a bit on the inside of the card to carry the colors to the inside for flow.
This was a very helpful video. I, too, wish I had your eye for balance and color, but since I don’t, I love tips on how I can do it myself with your videos and daily blogs and those of many other talented card bloggers.
I love these videos that show the process with your neat tricks to balancing a card design.
I love that you shared the two videos on your process , experienced card makers may feel this is ” something everyone just understands ” but not true , so thank you for the time and expertise you put into this! Your style is amazing . I check in everyday to see what you are sharing
Brian, that is a great process! I think the reason I love your cards so much is because of the fabulous balance they have. My eye is always drawn to your cards and the crispness of their layouts.
Thank you for sharing the process!