


If you are just skimming over my post (why would you do that!?), you might think I’ve re-posted the same project I shared yesterday, but it’s not the same. It’s similar and uses the same products, but it’s not the same project. Phew! You can now read on.
Today I’m showing you the third card I shared at a recent workshop with a large group of enthusiastic stampers (more pictures to share later this week):
 While this super-fun birthday card shares similar products as the project I shared yesterday (you can see that project here), this card more than just a card – it’s a gift card holder!
When Julie DiMatteo (my incredible team member and blogger at The Paper Pixie) first shared this fancy fold gift card holder, I was in love. It was easy enough that I could certainly recreate it in my own style, so I bookmarked her post. More than two years later, I decided to give it a try! You can see Julie’s original post here.
Building the Gift Card Pocket
The Bermuda Bay card base is a 4-1/4″ x 11″ piece of cardstock (one half a sheet of paper) that’s scored at 5-1/2″ and 2-1/2″ so it fits perfectly into a standard, medium envelope. The 2-1/2″ piece is folded back to create a pocket that’s perfect for a gift card. Here’s a closer look:
 I glued a 2-1/4″ x 4″ piece of Birthday Bonanza Designer Series Paper to the folded flap and punched a notch with a 1″ Circle punch. I then glued down the cardstock with strips of Tear and Tape along each side. The notch gives the recipient the perfect space to joyfully remove the gift card! What fun!
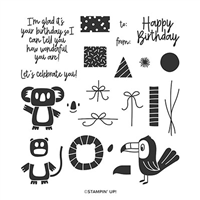
 Because I was creating this project with a large group, the toucan is stamped on Thick Whisper White and punched with a 2-1/4″ Circle Punch and framed with a Daffodil Delight cutout from the Layering Circles Dies. It was a lot easier than having everyone line up the Bonanza Die to crop the bird.
Quick Tips:
- Be sure to glue down the Designer Series Paper and cut the notch before you glue down the sides of the gift card flap. I said it above, but it bears repeating (I experienced that lesson a couple of times before learning to remember it).
- Glue down the 5-1/4″ x 4″ Whisper White panel and stamp the sentiment before adding the circles to the card to make sure you have everything just where you need it.
- I adhered the circles to the card base with Stampin’ Dimensionals that I applied directly to the card base to ensure that none spilled over the edge and onto the card panel below.
Here’s a picture of Sarah with her cute card and wonderful smile (she used the ice cream cones side of this paper, which makes this picture even sweeter):

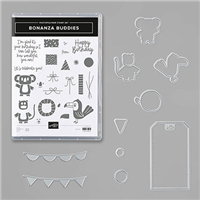
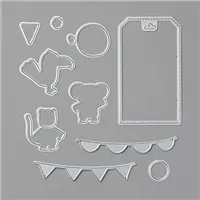
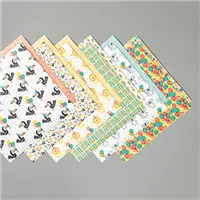
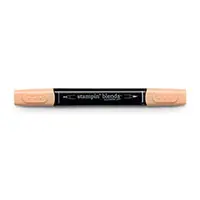
Bundles: Bonanza Buddies Stamp Sets: Bonanza Buddies, Label Me Bold Papers: Birthday Bonanza Designer Series Paper, Bermuda Bay, Daffodil Delight, Grapefruit Grove, Thick Whisper White, Whisper White Inks: Bermuda Bay, Memento Tuxedo Black, Stampin’ Blends (Daffodil Delight, Pumpkin Pie) Accessories: Bonanza Dies, 2-1/4″ Circle Punch, Layering Circle Dies, 1″ Circle Punch, Pearl Basic Jewels, Stampin’ Dimensionals, Mini Stampin’ Dimensionals


What do you think?! Can’t you think of a hundred ways to dress up this super-fun fancy fold?!
Thanks for stopping by today!
Brian

New Catalogs are LIVE
 Stampin’ Up!’s January – June 2020 Mini Catalog and Sale-a-Bration catalogs are live to customers. What fun! The pages of the Mini Catalog are FILLED with amazing products you will need for your Valentine’s Day and Spring projects – so much to love! AND there are so many great products to earn through Sale-a-Bration. To download these books and read more about how you can earn during Sale-a-Bration, CLICK HERE.
 Placing an order today? Of course you are! If you are placing an order for $150 or more, I want you to enjoy all of the Host Rewards you have earned. If your order is less than $150, I’d love for you please add this Host Code – TSC3F37T – when prompted. Thank you!


Love your cards using this bundle! They are so cute! Brings a smile to my face!!! 🙂
I’m so glad! Always wonderful to create smiles. Thanks so much! ♥
Perfect little pearl to top his hat! Charming idea for a gift card!
Thanks so much, Mary! It was a fun project to make and to share with the group that came to make it. ♥
Ok … ok … I give up!! No need to post another card tomorrow with this stamp set and DSP. I am adding it to my order!
“Uncle!” 🙂 I’ve got one more project with this set – hope you like it as much as these. Thanks so much, Katie! ♥
This is a super-fun birthday card esp with a gift card!
🙂 Thanks so much, Windy! ♥
This is just the kind of card I need to keep a few on hand because I give a LOT of gift cards . I bet it gets to be a lot easier after you make the first one .CUTE ! Speaking of cute …just look at Sarah`s !
Thank you for easy to follow directions !
It’s SO EASY to make, Sonny! WARNING – once you get started, you’ll hardly be able to stop making them. All the gift card receivers in your life will be SO HAPPY! ♥ Thanks!
This would be so much more fun then buying gift card holders. I give a lot of gift cards at Christmas and birthdays so by making my own I get to have fun and think about the person I’m making them for. Thanks Brian.
I’m so happy to share it, Grace! It’s a great combination of a card with a gift – and it’s so easy to make. Such fun! Thanks for your comments! ♥
Not only cute, but clever too. Love the giftcard holder!
Awwwww, another cute birthday card , yes love him , great job my friend , thanks for sharing with us , love you
Hugs Frenchie ♥️
I am with Katie! But, I will take more ideas with the set and paper! So cute. I tend to put a pearl or teeny rhinestone in the center of sequins – something about the little hole bothers me I guess. Whatever. Love Sarah’s ice cream version too. I hope to order the stuff so I can get the SAB twine and sequins. Love this as it is just a bit different for a gift card holder. And, yes, another smile.
This is such a happy card! Bright,and,fun!
Thanks, Brian, for sharing the dimensions of your birthday/gift card. So cute! Also, I want to say how much I enjoyed your Fall Stamp-Along this past November, 2019!
I love this card! Thanks for sharing.
Did you have a chance to look through your sets?