


Yesterday I shared a soft, sweet silhouette with an oval center and a trio of sunrise colors (you can see that card here). Today’s card might have a lot of the same elements (I was playing around and couldn’t resist), but this card has a very different feel. While yesterday’s card made me feel like I was sitting on a mountainside as the sun rose over the horizon, today’s card has a more modern edge to it. Here’s my card:
 Tips, Tricks and Reminders
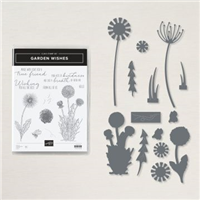
- Garden Wishes. The sweet sentiment and bold die cut image are both from the Garden Wishes Bundle. This bundle is great for any style – while the stamps are mostly vintage, the dies are quite modern and fresh. The combination of the two can make for some beautiful projects. Here’s a look at the Garden Wishes Bundle:
 Before cutting the dandelion outlines from Basic Black cardstock, I adhered a piece of Adhesive Sheets behind the cardstock. That way, the thin image, once cropped, has a perfect layer of adhesive behind it. That allowed me to place down the shape without having to place tiny dot of glue behind it. The Adhesive Sheets are wonderful!
 - Blending Brushes. I used Blending Brushes (now unorderable until the inventory can be replenished at the end of the month) to build the background on my card. Here’s a look at these brushes:
 The card I shared yesterday has a very soft backdrop:
  The colors in today’s card are much deeper and richer – I used the same colors but added more ink with the Blending Brush:
  I keep my Blending Brushes in an old fry basket I picked up at a store clearance a couple of years ago. Until my bottom shelf fills, I have the perfect spot for my basket:
  While these can be used over and over, I don’t have a sink in the Fungeon, so I’ve labeled the Blending Brushes with the color I used. I wouldn’t have a problem with using other yellows on my So Saffron Brush or other greens on my Old Olive brush, but I have not had to yet.
- Black and White Layers. On yesterday’s soft, sweet card, I added a layer of cardstock that I softly brushed with So Saffron. So soft! I wanted today’s card to embrace the modern look of the dandelions, so I wanted a Basic Black base for the card. I had just enough space to double up my frame, so I framed the white panel with black and the black panel with white. That gave me the bold, modern look I wanted. Yay! I used the same colors in my brushed oval – they really pop against all the black accents on this card. If you like this mix of So Saffron, Rococo Rose and Pool Party as much as I do, I hope you’ll save this for future reference:


Bundles: Garden Wishes Stamp Sets: Garden Wishes Papers: Basic Black, Basic White, Thick Basic White Inks: So Saffron, Rococo Rose, Pool Party, Memento Tuxedo Black Accessories: Layering Ovals Dies, Dandy Wishes Dies, Adhesive Sheets, Stampin’ Dimensionals


Thanks for stopping by today!
Brian

Butterfly Bouquet Product Collection – Available Now
 Stampin’ Up is early-releasing a new bundle from the upcoming 2021 Annual Catalog – and adding in two papers that are exclusive to this promotion. You are going to want to check these out! CLICK HERE to see these products in my online store.
 Placing an order today? Of course you are! If you are placing an order for $150 or more, I want you to enjoy all of the Host Rewards you have earned. If your order is less than $150, I’d love for you please add this Host Code – SPD9XWUH – when prompted. Thank you!


The modern bold silhouette on the blended background is oh so beautiful. You don’t need to wash the blending brushes. Rub the ink off on some paper until no more color transfers.. Then do a final swipe on the shammy. I use the scrap paper that’s all inked up for die-cuts.
Nothing short of perfection with those black stems!
Darn! I didn’t think I needed this stamp set. What can I say ? This card is a game changer! Stunning!
Today’s card is a perfect example of how one layout can be altered in ways to fit every occasion. When I am having a design block, I have several layouts I revert to. Lovely card, gorgeous layout and such a fun card to make. Great job pointing us all in the right direction. Thanks Brian!
The soft colors against the black looks beautiful. Love the double matte.
Once again, thanks for the inspiration Brian!
This black and white layout is a staple to have on hand, ready to make a beautiful card with practically any of your stamps. Thanks Brian!
Stunning Brian
Oh oh oh that inky oval is fabulous! You are a master blender! (But can you make a milk shake?)