


Two years ago I created a fun, layered card with the Daisy Punch that would soon become one of my most Pinned cards on Pinterest. I played around with the layers on the card with this punch. It has been so popular that I decided I should recreate the card with new colors and the new Medium Daisy Punch. Here’s my new card with the Medium Daisy Punch:
 The card I created with the Medium Daisy Punch is a notecard size (3-1/2″ x 10″, scored at 5″). I lined the envelope flap with a fun design from the Subtles 6″ x 6″ Designer Series Paper. Here’s the original card I shared two years ago with the larger Daisy Punch (a standard card size):
 Not only did I want to recreate this fun layering with the new punch, but I wanted to create a completely different feeling with new colors and stamps. It was simple, easy and fun – and I love the updated look of this fun favorite.
Tips, Tricks and Reminders
- Daisy Lane. How fun is this sweet, new bundle? The Daisy Lane Bundle includes the Daisy Lane stamp set (a mix of beautiful flowers and great sentiments) and the Medium Daisy Punch (a smaller version of the oh-so-popular Daisy Punch). The styling of this set works beautifully with the Daisy Delight stamp set (#143669), and the large flower in the Daisy Lane stamp set coordinates with the Daisy Punch (#143743). Here’s a look at this bundle:

- Building the Daisy. There’s something so happy about a daisy – you can’t ever go wrong with this flower. Here’s a look at the flower on my card before I added the sentiment:
 Here’s how I built this flower:
- I used the punch to crop a daisy from Thick Whisper White.
- I cropped the negative space left on the Thick Whisper White with Layering Square Dies.
- I glued that cropped square to a piece of Rococo Rose cardstock that measures 1/8″ longer and wider than the cropped square.
- I used the punch to crop a daisy from Rococo Rose.
- I glued the Rococo Rose to the Rococo Rose base. It might not show well in the picture of the card, but it’s more visible in person.
- Sweet Color Combination. The colors I used on this card are very dusty and sweet. This mix of pink and green reminds me of sherbet ice cream, and the tan reminds me of a cone. Maybe I’m just jonesing for some sugar? If you like this combination of Rococo Rose, Mint Macaron and Crumb Cake, please save this:


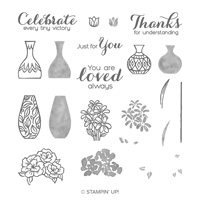
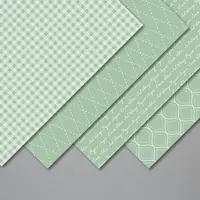
Stamp Sets: Vibrant Vases, Well Said Papers: Crumb Cake, Rococo Rose, Mint Macaron, Thick Whisper White, Subtles 6″ x 6″ Designer Series Paper Inks: Tuxedo Black Memento Accessories: Stitched Shapes Dies, Medium Daisy Punch, 1″ Circle Punch, Stampin’ Dimensionals


I hope you’ll pop over to see the cards by the design team members and to play along with this week’s challenge.
Thanks for stopping by today!
Brian

Amazing Promotions in July and August
Two great Stampin’ Up! promotions kick off in July – you don’t want to miss these. Click on either of these graphics to learn more:


 Placing an order today? Of course you are! If you are placing an order for $150 or more, I want you to enjoy all of the Host Rewards you have earned. If your order is less than $150, I’d love for you please add this Host Code – PNRMKCVD – when prompted. Thank you!


I love both cards, Brian. Thanks for the explanation of how the new daisy was cleverly made. Safe travels on your return home.
Perfect little daisy note card. Your color combination is beautiful.
Beautiful little note card Brian. I’ve been combining the larger daisy punch with this new one and boy, the results are really gorgeous. Hope you are having the time of your life on this Greek Islands trip.