


On Sunday, I shared this card with you as a part of the Paper Players theme challenge:
At the time, I promised you a quick and easy tutorial on how to make these groovy sunbursts – these pointy kites that extend from the center of this card. The week almost got away, but I remembered my promise to you, so here it is. I’ve added a couple of assembly tips, as well. Why? Because I really, really like you. I hope you find this helpful:
Making a Groovy Sunburst
The basis for the shapes that stick out from the center of the circle is a square. Let’s make a burst with a 2-1/2″ square.
- Cut a 2-1/2″ x 2-1/2″ square.
- At the halway mark on two related sides, make a little mark. In this case, I marked the 1-1/4″ mark on one side:

and again at 1-1/4″ on a corresponding side: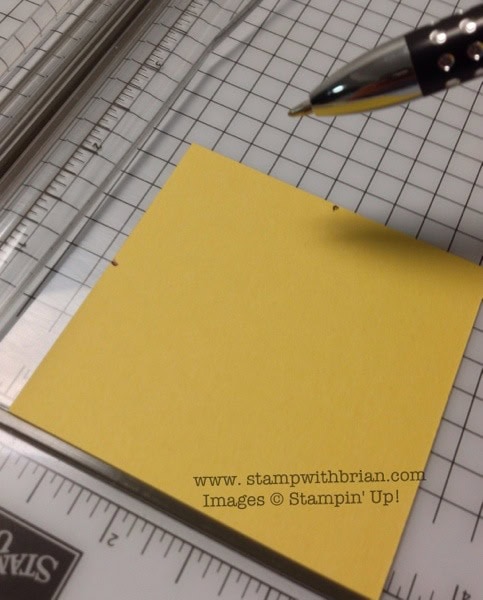
The next (very simple) step is to cut the square from the corner opposite each mark to each mark. I’ve drawn the cut lines in the image below so you can see what I’m talking about: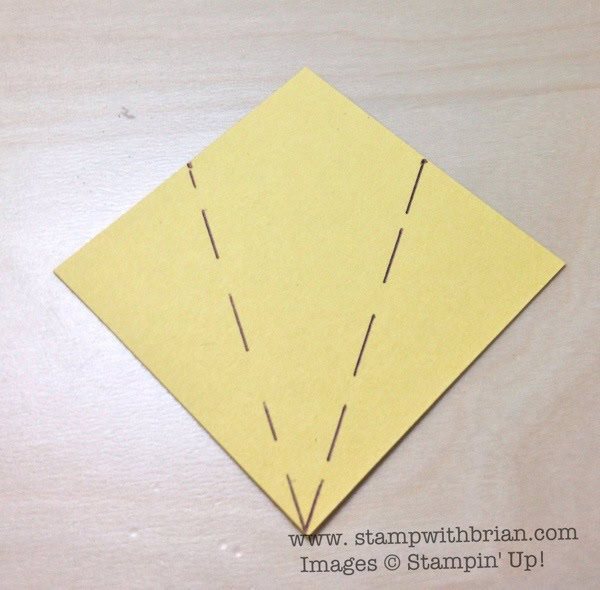
Flip the image over to mount it on your card so you won’t see the dots you made as markers (or the dotted lines if you chose to include those 🙂 ).
Once you’ve made one starburst, make more – same concept but different sized squares. A sunburst made with a 2″ square or 1-1/2″ square would fit nicely inside this one. Also, save the pieces that you trimmed off. I’m sure you can create a great project with those triangles – or wedge them in and around your sunburst. Yippee!
A Couple of Assembly Suggestions
It’s difficult to line up patterns and center them perfectly on the center of the card. The square pattern in the center of this card is one of those “eeek” items that’s difficult to line up. Because I knew I’d be additng this large circle (with the sentiment) on the center of my card, I punched a circle, added glue and glued down the pieces, careful to line them up just like I wanted.
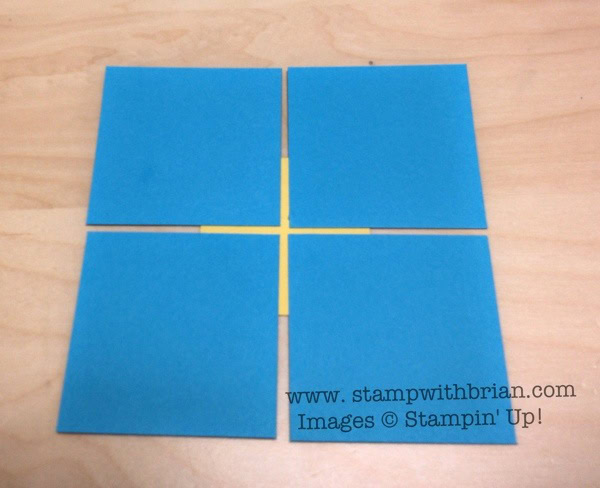
Much easier than trying to line it all up on the center of the card stock, don’t you think? I then added the starbursts the the blue card stock. Here’s a shot from the backside of the assembled items:
If you look closely, you can see the white dots on the orange bursts – these were my guides for the sunburst. You won’t see them when I glue this down, though, because I flipped them over. The side you see above will be slalthered with glue and stuck to the front of a card.
I hope this is helpful. I know there are all levels of cardmakers who read my blog – I hope I’ve shared something that each of you can either learn from or something that refreshes your memory about a fun trick.
Thanks for stopping by my blog today!
Brian

Swatch Books and Product Shares. 189 pounds of Stampin’ Up! goodness arrived at my doorstep on Wednesday. I’ve worked tirelessly to sort through paper, ribbon and embellishments. I’m making swatch books and getting these items all ready to send out this weekend. Yippee! If you didn’t sign up for product shares or a set of my swatch books, check them out! There’s still time for me to order up another round. 🙂 Check them out here.


Thanks so much for the tutorial on the sunburst! Now I can reference here, when I need to. I’m so glad you think these things up for us…I won’t strain my brain, this way!! LOL!
Thank you for this tutorial, Brian. I was wondering how you made the sunbursts to fit so perfectly. I’m a visual crafter so It’s always easier for me to see the project and read the instructions step by step. This is a very beautiful card!!
I am like Maria…you gotta show me . This is such a good and clearly understandable tutorial !! It also gave me an idea for a new card that I have been trying to figure out how to do the placement of items to keep them straight and together . But….the most exciting thing is that the Shares will soon be on their way …Heigh -Ho the dari-o…the Shares are on their way . ( for those that are interested …the lyrics can be sung to The Farmer in The Dale or Dell ) I will be singing this while sitting by my mailbox. Wow! 189 pounds of bliss !!! Lucky you !!
i have my lawn chair down by the mailbox patiently waiting for the paper books to arrive, no pressure on you brian,lol, just excited to see them. thank you and love the card and tutorial you made for us.
Your tips and tutorials are so helpful and I always learn something new or get a new perspective. Thank you!
The King reigns strong! Once again you hit one out of the ballpark Brian. Thanks.
I agree with everyone….your instructions are always fabulous…and the pictures are so helpful…thank you! Have a great weekend, oh yeah, it will be a busy one for you!
You are the BEST teacher! I can’t imagine how long it would taken me to figure out how to make the starbursts. Thank you.