


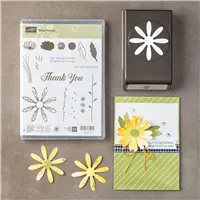
Late last week a huge shipment of Daisy Punches arrived at Stampin’ Up!’s warehouse. What a joy! Since the launch of Stampin’ Up!’s Annual Catalog on June 1, the Daisy punch (and, subsequently, the Daisy Delight Bundle) had been on backorder. The bundle, which was part of our Demonstrator pre-order in May, was far more popular than Stampin’ Up! had anticipated, so they had to turn off the product numbers while waiting for more punches to arrive at the warehouse. I made a super-fun, layered card with this fun punch for today’s project. Here’s my card:
 Tips, Tricks and Reminders
- Layering the Daisy. You might not have seen the layering at first glance, but take another look. Aww…don’t worry about it…I’ll show you (but I suspect you already knew that). Here’s a side-view of this daisy centerpiece:
 I punched a daisy in the center of a 2-7/8″ x 2-7/8″ piece of Thick Whisper White to create a negative image of the daisy. With Stampin’ Dimensionals, I layered that panel over a slightly larger piece of Melon Mambo. Then, I punched another daisy with Melon Mambo cardstock and curled the edges with a bone folder. With dimensionals, I glued the daisy to the center of the negative image, making certain the petals were offset with the original. I punched this super-fun sentiment from Ready to Pop with a 1″ Circle punch and added it to the center of the flower.
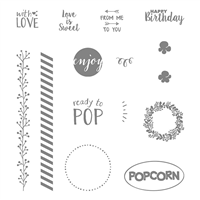
 - A Tale of Two Sentiments. The Ready to Pop stamp set gave me the fun sentiment in the middle of this daisy. I stamped it in Basic Black on Daffodil Delight cardstock and punched it with a 1″ Circle punch. How fun is this sentiment?! I “found” it in a stamp set I’ve owned for more than a year and was delighted to showcase it in the center of this flower. Here’s a look at that stamp set:

Ready to Pop, Stampin’ Up!
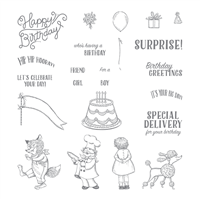
The coordinating sentiment below the square panels is from the Birthday Delivery stamp set – what fun! Here’s a look at this set:

Birthday Delivery, Stampin’ Up!
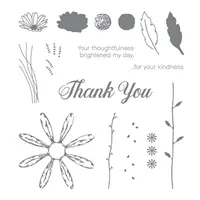
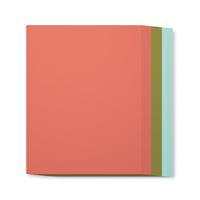
- Spring Fun. We knew Spring had arrived when Grandma planted her gerbera daisies – bright and colorful flowers. Pinks, oranges, yellows, purples – such a beautiful assortment of beautiful colors! I made my daisy pink (Melon Mambo) with a yellow (Daffodil Delight) center and accented these bright colors with Basic Black. If you like this combination of colors, please save this:


Stamp Sets: Ready to Pop, Birthday Delivery Papers: Melon Mambo, Daffodil Delight, Basic Black, Thick Whisper White Inks: Archival Basic Black Accessories: Daisy Punch, 1″ Circle punch, Stampin’ Dimensionals


If you haven’t yet ordered your Daisy Punch (what are you waiting for?), here’s a list of coordinating items in this wonderful suite:


Thanks for stopping by today!
Brian

Order Big & Earn an ADDITIONAL Rewards. All orders over $150 earn Stampin’ Rewards – what a great opportunity to earn free products (your choice) when you treat yourself to a fun shopping spree! During June, Stampin’ Up! is giving us one more incentive to place a big order. 🙂 Not only can you earn the standard Stampin’ Rewards for purchases from the new catalog, but you’ll earn an additional $35 in Stampin’ Rewards (to spend however you want) for orders greater than $350. That’s HUGE!
Sign Up for my Newsletter. I’ve created a fun newsletter and want to share it with you. To sign-up to receive Brian’s Bulletin, please click on the link below:


Brian, I love the dimension created with this technique. I was one of those peeps whose punch was backordered. It should be here tonight. I plan to CASE you card first. Thanks for the daily inspiration. Enjoy your trip to Thailand.
I love the colour combination and I think you may have convinced me to get the daisy punch!
FABULOUS….again!
I like the daisy. I would not have thought to use negative space. It is gorgeous.
I really like the negative space as a layer. Great idea!
WOW ! The colors zapped me on first look and then when you revealed the DAISY SURPRISE IMAGE …..well ….I am impressed !! I have not gotten my punch ordered yet because I was waiting for the frenzy to subside ,but I have it on my July order list !
Love that little ENJOY in it`s little circle (CUTE)
I love the daisy negative layered behind the daisy! Perfection! And a great card to create multiples of!
So clever! Love this idea.
You always amaze me with your creativity!!! Awesome card!!!
Always clever with the techniques, the negative space is a winner!
Oh Brian – Gorgeous doesn’t even begin to describe this card. Fantastic, Super, Fabulous – none of them are good enough. The dimension you created using the negative combined with the positive could not be any more impressive then it is. Thank you for sharing your amazing talents with us every day!
With so many Daisy Delight cards out there, I really appreciate this new approach to using the negative space to make the daisy! So clever, Brian. TFS
Brilliant use of the daisy die cut and negative space.
Oh my goodness – love the center of the daisy. Couldn’t figure out where the sentiment came from…..that’s a great stamp!
In love with your layered daisy!
This is one reason I will now call you…”Brian, the Brilliant”. That is all… ???❤