


I make so many cards and still miss out on using some of the most exciting products I buy. I have been excited to use the Sending Flowers Dies since they were first revealed to us, but today is the first time I’ve taken them out of their wrapper to make something. This is such a great set of dies! Here’s my card:

Tips, Tricks and Reminders
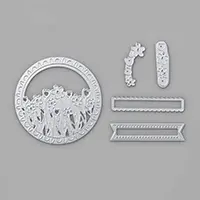
- Sending Flowers Dies. The Sending Flowers Dies are part of the February-released Product Coordinating Release. There are 5 dies in the set – once crops out a huge circle with a field of flowers inside it. There’s even a really cool scallop feature around the circle that’s cropped out. Here’s a look at the Sending Flowers Dies:
 and here’s a closer look at the flowers I cropped out. The leaves and stems remain part of the cropped Designer Series Paper. The flowers are there, too, but I cropped more flowers in different colors and added them to the cutouts. How sweet are they!?
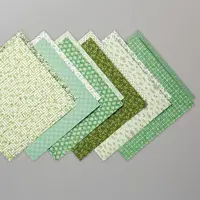
  The background panel of this card front is found in the Garden Lane Designer Series Paper – I love the mix of soft greens in this pattern. The flowers really pop against a backdrop of Night of Navy. Here’s a look at the colors and patterns in the Garden Lane Designer Series Paper:
- Quick Tip for Gluing Down Tiny Pieces. As you create cards, you’ll find times when you need to glue down little pieces that aren’t sticking to the card front – it might be a banner end, a sentiment strip or a tiny flower from the middle of a circle die that’s being really difficult. Here’s a tip to help you out in a pinch:
 On a small scrap of paper (this is a small strip of Real Red cardstock I had left from another project), add a small dab of glue. Slide that strip under the unruly piece you want to glue down to add a little glue underneath. Pull the strip out and glue the piece down. Voila!
 - Sweet Color Combination. While the foundation for this card front is Mint Macaron and Soft Sea Foam, the flowers I’ve added are a Spring-like mix of soft colors. If you like this mix of So Saffron, Blushing Bride and Highland Heather as much as I do, please save this for future reference:

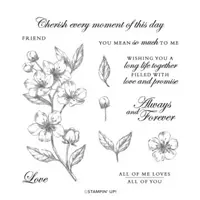
Stamp Sets: Forever Blossoms Papers: Garden Lane Designer Series Paper, Night of Navy, So Saffron, Blushing Bride, Highland Heather, Whisper White Inks: Night of Navy Accessories: Sending Flowers Dies, Pearl Basic Jewels, Stampin’ Dimensionals


Thanks for stopping by today!
Brian

New Product Coordination Products Now Available
Stampin’ Up! has released some amazing products that coordinate with products in Stampin’ Up!’s January – June 2020 Mini Catalog and 2020 Sale-a-Bration Brochure. You don’t wan to miss out on these items. You can see them all here: New Catalogs are LIVE
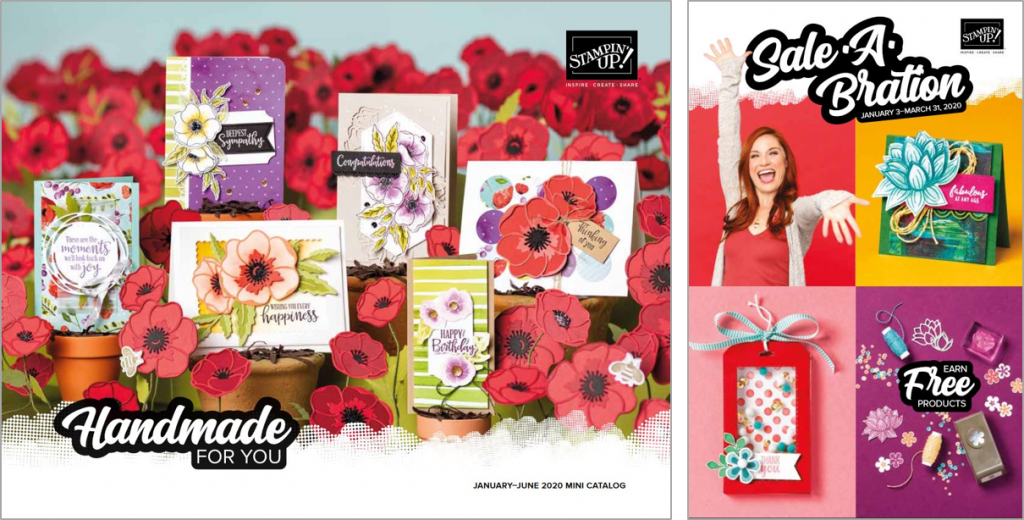 Stampin’ Up!’s January – June 2020 Mini Catalog and Sale-a-Bration catalogs are live to customers. What fun! The pages of the Mini Catalog are FILLED with amazing products you will need for your Valentine’s Day and Spring projects – so much to love! AND there are so many great products to earn through Sale-a-Bration. To download these books and read more about how you can earn during Sale-a-Bration, CLICK HERE.
 Placing an order today? Of course you are! If you are placing an order for $150 or more, I want you to enjoy all of the Host Rewards you have earned. If your order is less than $150, I’d love for you please add this Host Code – TSC3F37T – when prompted. Thank you!


Such a clever use of DSP for the card front. Love this. ❤️
Thanks so much, Linda! I had planned to use a darker green page, but the softness of this one really spoke to me. Glad you like it! ♥
Adore the pearls for dotting the darling flowers!
Thanks, my friend! ♥
I’m just crazy about this card Brian. And your tip with the little dab of glue is BRILLIANT.
Thanks so much, Kadie! This little tip has saved me many times – happy to share. ♥
What a sweet card! So glad to see how that Die is used. What a great tip about the little dab of glue! Love your card!!!
Thanks, Deanette! That tip came about in a moment of need. 🙂 So glad you like it!
Brian, your sweet flowers inspire us to soldier through the remainder of winter up here in the north! And thanks for the glue tip!
Such a huge difference between what you are getting and what we are getting – some of our flowering trees bloomed this weekend (2-3 months early), and it’s not looking good that they can stay bloomed. Happy to share, my friend! ♥
Love the use of the designer paper here and the pop of color with the flowers! Sweet card!
Thank you so much, my friend! ♥
Love how you used the DSP for the die cut! It is perfect. Have a great week 🙂 !
Thank you so much, Debbie! ♥
??? “unruly”???. I almost snorted coffee out my nose!Such a sweet card and funny post( and a great tip for unruly paper!)
Still laughing
🙂 This makes me happy – except for the part about coffee in your nose. I’m not happy about that. 🙂 Thanks, Cindie!
I, too, have loved this die set since it came out. Your card is very pretty. I love the color combo and I’m thinking this could easily be an Easter card. The pretty die for the sentiment is a great addition. Enjoy your day!
Thanks so much, Hilda! ♥
Gorgeous card Brian! That die is amazing. Now question – did you back the DSP with thick white card stock before you die cut the floral image? I know you have mentioned backing DSP to give it stability before but I wasn’t sure if that didn’t make it too thick for the die cutter. Please keep the warm weather down south. This winter has not been cold enough or snowy enough to kill all the bad bacteria floating around. LOL
Good question! I cropped the flowers from the DSP and then glued it to a panel of Night of Navy that is the same size as the DSP panel. That is then glued to the Whisper White frame that’s popped up from the Night of Navy base. Does that make sense? ♥
You make it look so easy! Thanks for sharing ❤️
But it IS easy, Liz! 🙂 Thanks! ♥
Great way to use this beautiful green paper . Love this DIE !
♥ Thanks so much, Sonny! ♥
Hello Brian, I am a long-time stamper and former demonstrator. I just found your blog from a google search, and I love your work. This card in particular is gorgeous! I have a question: do you have the dimensions of the 2 tag dies? I want to see how they differ from the classic label punch. Thank you so much. I look forward to following you.
Thank you so much, Colleen! It’s wonderful to hear from you, and I’m glad you like what I’m sharing. ♥ The dies in this set of dies are VERY different from the wonderful Classic Label Punch. These dies are each about 5/8″ tall and about 3-1/4″ wide. The Classic Label Punch yields a punch that’s about 3/8″ tall and 2-1/8″ wide. Hope that helps!
Thanks Brian! I wish Stampin Up would list the size of every stamp and die, but I know they can’t. Thanks for the reply with the sizes!
What an elegant card! It just exudes happiness! Thank you sooo much for sharing your creativity, Brian! I love following your work! ?
Thank you so much, Kate! It’s always wonderful to hear that kind of feedback. 🙂