


It’s November, so Halloween is now behind us. How is that even possible? Today, I’m sharing two versions of a card I shared last week. Although it’s a Halloween card (that’s SO yesterday!), I know you will forgive me because my post is jam-packed with helpful design tips. You’re welcome.
Before I jump in, I want to let you know that my Halloween night was – once again – uneventful. Nine years in a row with no trick-or-treaters. While our neighborhood has seen some new, young families move in over the past year or two, they were either not trick-or-treating or trick-or-treating elsewhere. As the night turned dark, I simply placed the bucket of candy (and other goodies) at the top of the driveway. After I schedule this post, I’ll pull the bucket in.
Small Changes => Big Difference
A couple of small changes can make a big difference in anything we do. It’s no different with card making. A couple of updates to a “bad” or even a “not what I wanted” card can really turn it into a “wow” card. Last week, I shared this card:
 There’s pretty no occasion for this card other than Halloween, but please stick with me. What you didn’t know – is that this was the second card I made for the CAS(E) This Sketch challenge. I’m going to quickly share the first version and then tell you about the changes I made. Here’s the first version of the card:

Here are the updates I made and a quick explanation for the changes:
- BOO. The Whisper White BOO wasn’t sitting right with me. It needed something else. It was popped up with Foam Adhesive Sheets but still felt flat – no pizzazz. I added spiderwebs behind the BOO in my second card and cropped the word with Black Glimmer Paper so that it would tie with the glimmer place on the base of my card.
 That additional pop of shine really helped to tie together the elements of my card.
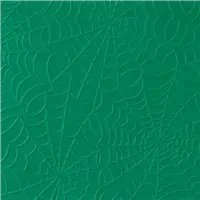
 - Black-to-Gray. I really loved the Basic Black panel of cobwebs against the black base of the card – it felt so very Halloween, but the BOO wasn’t working for me. Before I threw it all out, I thought to try the background in gray – I went with Smoky Slate. I couldn’t have loved it more.
 See the difference? I know the Basic Black Glitter Paper letters wouldn’t have stood out against the black background (even with the white spider webs), so the Smoky Slate gave me just what I needed. Yay!
 - Added element. Once I had placed the BOO on the first version of my card, I needed an additional element to accessories my sentiment a bit. I tried a couple of spiders (made sense because of the spider webs, right?) but went with a bat from Hallows Night Magic.
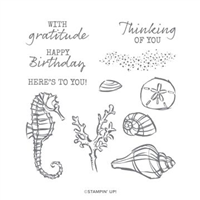
 I love the bat, but it made no sense here (I didn’t realize that until I was working on my second version). When I decided to pull “TO YOU!” from my Seaside Notions stamp set, the entire card came together for me.
  Who could have guessed the stamp set would contribute to a Halloween card?


Gosh, I hope you like the remake better than the original – I sure do!
In my post on Thursday, I also shared how I popped up my top panel against the Glitter Paper. I liked it so much I thought I would share it again here.
- Acorn Punch from Autumn Punch Pack. I used the acorn punch from the Autumn Punch Pack to assemble today’s card – you can’t see it here, but I definitely used it. Want to know how? Of course you, do! Here’s a clue:
 Glitter Paper has a paper back that’s easy to glue down, but the glittery surface can be tricky, right?! Here’s how I assembled the black glitter background on this card:
- I punched four acorns just inside the edges of the paper (it doesn’t have to be an acorn, but the acorn gave me just what I needed) and glued the glitter paper to the Basic Black card base. Again, THAT side of the paper is easy to glue down since it’s just paper.

- After the glitter paper was glued down, I added Stampin’ Dimensionals just inside the holes – each Dimensional attached to the paper below the glitter paper:

- Then I centered the top panel over the card base and pressed it into the Stampin’ Dimensionals below. So easy!
- I punched four acorns just inside the edges of the paper (it doesn’t have to be an acorn, but the acorn gave me just what I needed) and glued the glitter paper to the Basic Black card base. Again, THAT side of the paper is easy to glue down since it’s just paper.


Here are links to the products I used on my card:


Thanks for stopping by today! I have lots of fun projects to share with you in the coming week. ♥
Brian

Pumpkin in the Fungeon
 I’m hosting monthly Zoom calls with my Paper Pumpkin subscribers – and I’d LOVE for you to join, too! To learn more, CLICK HERE.
 Placing an order today? Of course you are! If you are placing an order for $150 or more, I want you to enjoy all of the Host Rewards you have earned. If your order is less than $150, I’d love for you please add this Host Code – Q7XRMH39 – when prompted. Thank you!


I adore how the glimmer letters tie to the background! Great update!
Brian, how clever you were to figure out the dimensionals and the black glitter paper! Let us know how your treat bucket fared in the driveway last night ????♂️
What a great tip about attaching to the glitter paper!
Love the card!
What a GREAT TIP on adhering down something on the glittery surface side of Glitter Paper. YOU ROCKED this post my friend.
Thanks so much for the tip about the dimensionals! That has always been a deterrant for me to use glimmer paper. We didn’t get many trick-or-treaters either, for the same reasons as you have mentioned.
You gave us a treat with that trick, B! Happy November!
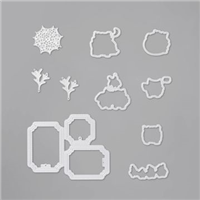
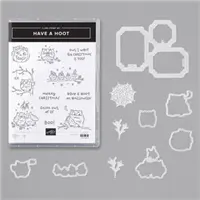
Our cards are always a work in progress. Loved the tip on adhering a layer to glitter paper by punching out corners and us using dimensional. You did a great job giving clear instructions. I’m wondering if the white boo was cut out of our white velvet paper it might have made a difference on the black card and also using sentiment vs bat. Both cards are great but I’m partial to black on black. Your post has me wanting to play around with additional options, only I don’t have the boo set or the embossing folder.
Love your second Boo card but something about that Smoky Slate one just pops!