


Emma and I hosted the bonus call for our Textured Notes Super-Awesome Fun Time Card Kit over the weekend. It’s always fun to hang out with the participants and find out what they enjoyed or what challenged them the most. The cards I design for these kits are exclusive to the kit – I don’t share the projects on my blog. Today, though, I’m sharing a concept from one of the cards in this kit that seemed to go over well on our call. If you like to color (or like a little challenge), this card is for you! Here’s a new card I made with different products, new colors and a redesigned layout to share with you:
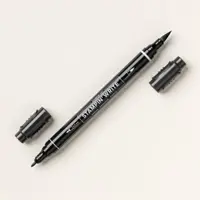
 The panel at the center of this card starts with a black-and-white pattern from the Mixed Media Florals Designer Series Paper. With the bullet tip of Basic Black Stampin’ Write Marker, I created a pattern on the panel, dividing it into five sections. I then added color to the background of each section with a mix of soft and bright colors. Here’s a closer look:
 Rather than color the flowers and leaves on each section, I colored the background and left the flowers and leaves white. I love the effect – it’s giving a stained glass effect, don’t you think? Here’s a closer look (before I added the sentiment:
 It’s relaxing to just color, but I want to offer two tips – (1) work in a ventilated area and (2) pay attention so you don’t color into the wrong area or accidentally color a leaf or flower.
Here’s a look at all of the colors and patterns in the Mixed Media Designer Series Paper:
 My card features the black-and-white page (fifth on the top row above) and five sweet colors I added with my Stampin’ Blends. If you love this mix of Spring colors as much as I do, I hope you’ll save this for future reference:

Stamps: Hooray for Surprises Papers: Mixed Media Florals Designer Series Paper, Lovely Garden Designer Series Paper, Daffodil Delight, Basic Black, Basic White Inks: Versamark, Basic Black Stampin’ Write Marker, Stampin’ Blends (Pretty in Pink, Shy Shamrock, Balmy Blue, Daffodil Delight, Peach Pie) Accessories: 2″ Circle punch, White Wow! Embossing Powder, Heat Tool, Stampin’ Dimensionals


Thanks for stopping by today!
Brian

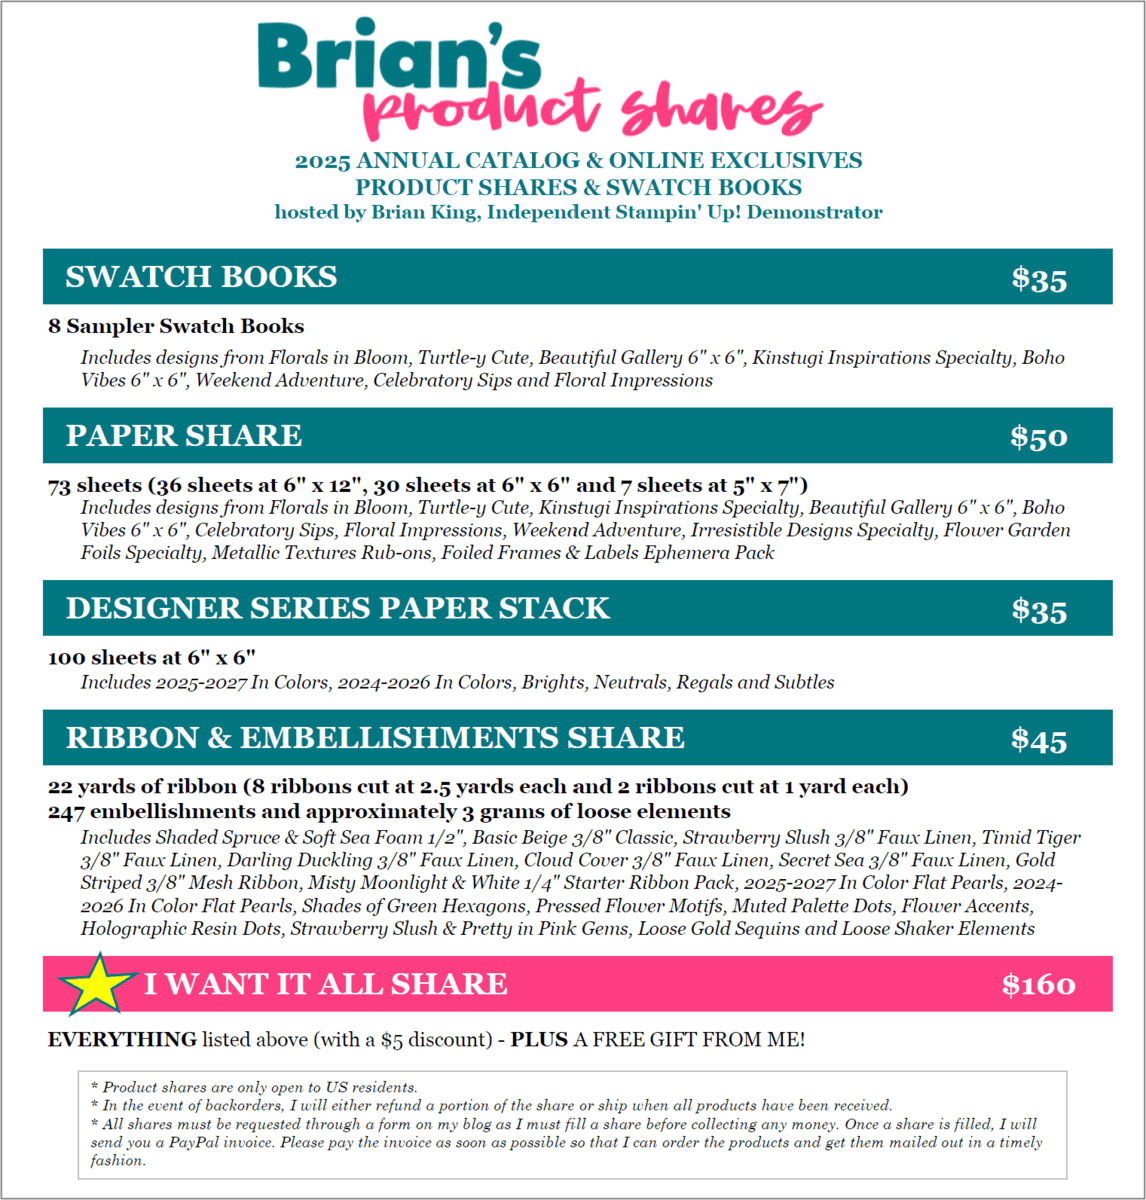
Product Shares
On Thursday, I shared my Product Shares and Designer Series Paper Swatch Books from Stampin’ Up!’s 2025 Annual Catalog. What a great way to enjoy a little bit of all the papers, ribbons and embellishments from the new book! To learn more and sign up, click on the image below:
 2025-2027 In Color Bundles
The new catalog, which launches May 6, also introduces us to 5 new In Colors. To give you a huge bundle of all the products in the new colors (papers, inks, markers, ribbons), I’ve created a collection of In Color Bundles at a discount. To learn more and sign up, click on the image below:

Spring One-for-One Card Swap
I’m hosting a One-for-One Card Swap, and I’d love for you to join in! To learn more about the guidelines and timeframe, click on the image below:


Beautiful use of this paper. Love how it all lines up!
Thanks, Mary! The design is fun to make, and the patterns are fun to color. ♥
I love this concept of drawing lines and coloring to make a beautiful card. It certainly fools the eye. Enjoy your day!
Thanks, Hilda! It was quite fun to play with – so glad you like it. ♥
This is a fun technique! Great idea for card makers of all ages with perfect results!
You’re so clever Brian!
Thank you so much, Barbara! You are the best! ♥
I really like this card. I think it’s the small sections to color and the brighter colors. I am going to try this ASAP. I just caught up on your Charleston trip post. I vacationed there for many years, and it made me want to go back—maybe soon. Have a blessed day.
Thank you so much, my friend! I had fun with this one and hope you have played with it, too. I’m FROM Charleston and went to college there, but it was nice to visit as a tourist. ♥
How cool is this? Until I read how you did this I thought you actually cut those pieces and glued them back into place on the black cardstock layer. It’s amazing how the marker creates that illusion. Adding color to the background is such a great tip. TFS
Thank you so much, Bobbi! The illusion is really fun, and the bullet tip of the marker gives the exact width you want. So glad you like it! ♥
Love this idea for the dip. Can’t wait try it myself! Thanks for the inspiration, Brian.
Yay! I’m so happy to share, Jen! So glad you like it. Enjoy!
Brilliant, Brian! Way to think outside the box! I loved the Super-Awesome card kit card and this one takes it to the next level! I’m definitely going to CASE this one, too!!
That makes me so happy, Kathy! Thanks so much! ♥
We did love this technique and I can’t wait to extend it the way you did today!
Thank you so much, Penny! I’m so glad you enjoyed it and hope you have fun with this variation of the technique. ♥
Love this card!!! Can’t wait to work on it with my kit!!!
Thanks, Sharon! The one I designed for the kit is very different, but the concept is similar. I hope you have fun playing. ♥